


Recording Studios Solutions
Recording Studio problem is simple-no matter how good the microphone, preamp or recording system, unless the acoustics are balanced, your recordings will not translate well when played back on other systems.
Hard surfaces such as gypsum walls, windows and hardwood floors cause primary reflections which make placing instruments in the stereo field difficult.
Secondary reflections introduce flutter echo and a reverb trail which interferes with your mix. Low frequencies collide – either in or out of phase – causing peaks and valleys (room modes and comb-filtering) which create hot spots depending on where you are sitting in the room.
Whether you are designing a recording studio, vocal booth or isolation room for instruments, the desired outcome is the same: The room must keep outside noise from polluting the recording and the room itself must not introduce anomalies to the voice or instrument.
How To properly configure Recording Studio, Vocal Booth Room:
Determining the size of the room
Designing Vocal booths that are generally smaller rooms designed to accommodate one or two people, while isolation rooms need to be large enough to accommodate a drum kit, guitar amp and so on. Most vocal booths tend to range from 3′ x 4′ to 4′ x 6′ in size. (40cm x 50cm to 50cm x 80cm)
Wall and floor construction
Ideally, you will want to build a ‘room within a room’ whereby the walls of the vocal booth are separated from the studio so that they are decoupled. The same applies to the floor. Professional studios will ‘float’ the floor by constructing walls on top of U-shaped rubber isolators.
Wall and ceiling construction can be made with various degrees of isolation. Standard wall construction with one-layer gypsum board on each side of the wall would be the minimum. You can increase the isolation by applying a second layer of gypsum board to increase the mass. Keep in mind that sound is energy and the more mass you have, them more energy will be required to cause the wall to vibrate and pass sound.
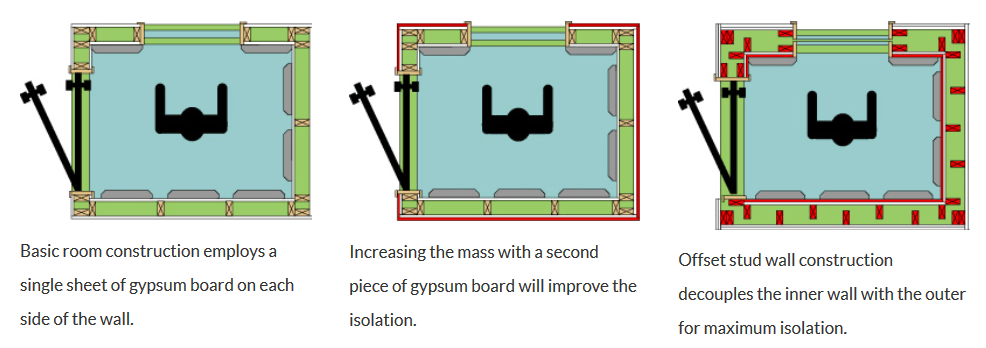
You can significantly improve the room isolation by decoupling the inner and outer wall using resilient channel or offset stud wall construction. By allowing each surface to float independently, energy must work twice as hard to get both surfaces to vibrate. Altering the mass on one wall by varying the thickness of the gypsum board will introduce an impedance mismatch. This helps eliminate vibrations from working sympathetically. The best isolation will occur if you can both increase the mass and decouple the wall and ceiling surfaces.
Acoustically treating the inside of the room
A common problem found in most voice-over rooms is that they tend to sound boxy. This is due to a combined effect of the room dimensions and the quality of the acoustical material used to control the room reflections.
One merely needs to calculate the resonant frequency inside the room to determine where the problem will be. The physical size of a typical vocal booth will produce standing waves in the 150Hz to 350Hz region. This causes the voice to be accentuated in the lower mid range.
| Room Dimension | Metric | Resonance |
| 8 feet | 2.44 meters | 141 Hz |
| 7 feet | 2.13 meters | 161 Hz |
| 6 feet | 1.83 meters | 188 Hz |
| 5 feet | 1.52 meters | 226 Hz |
| 4 feet | 1.22 meters | 283 Hz |
| 3 feet | 0.91 meters | 377 Hz |
This table shows the room size dimensions and the resulting standing waves that will be produced inside. A 6 foot (1.83 meters) wall will produce a resonance at 188Hz.
Selecting the right absorptive panels
When treating the inside of a vocal booth, it makes sense that one should select an absorptive material that actually works in the vocal range. Although this seems obvious, most vocal booths employ materials that are unable to absorb the critical lower mid-range where the voice energy is most prevalent.
The problem is further accentuated by the use of low quality, low density acoustic materials. Low density 1″ and 2″ thick foams are usually ineffective below 500Hz. When they are applied inside a vocal booth, they only remove the high frequencies, leaving the lower mid-range unaffected. Combine this with the problem caused by the room geometry and the results are predictable… the room sounds bad!
If you consider the frequency response of a typical human voice, we can see that most of the energy is centered between 200Hz and 1500Hz. If you refer back to the room dimensions and resulting resonant frequencies, it is easy to understand how the boxy ‘chest hump’ tone in most vocal booths is produced.
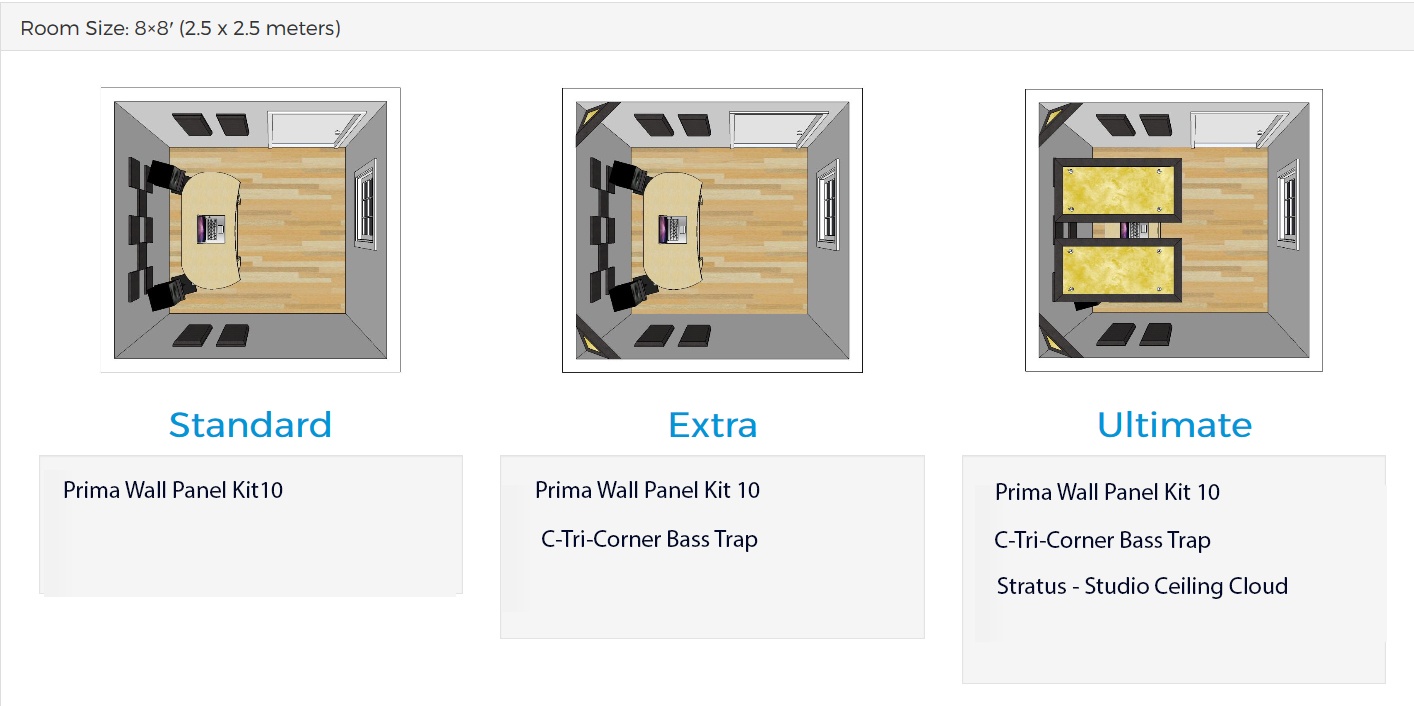
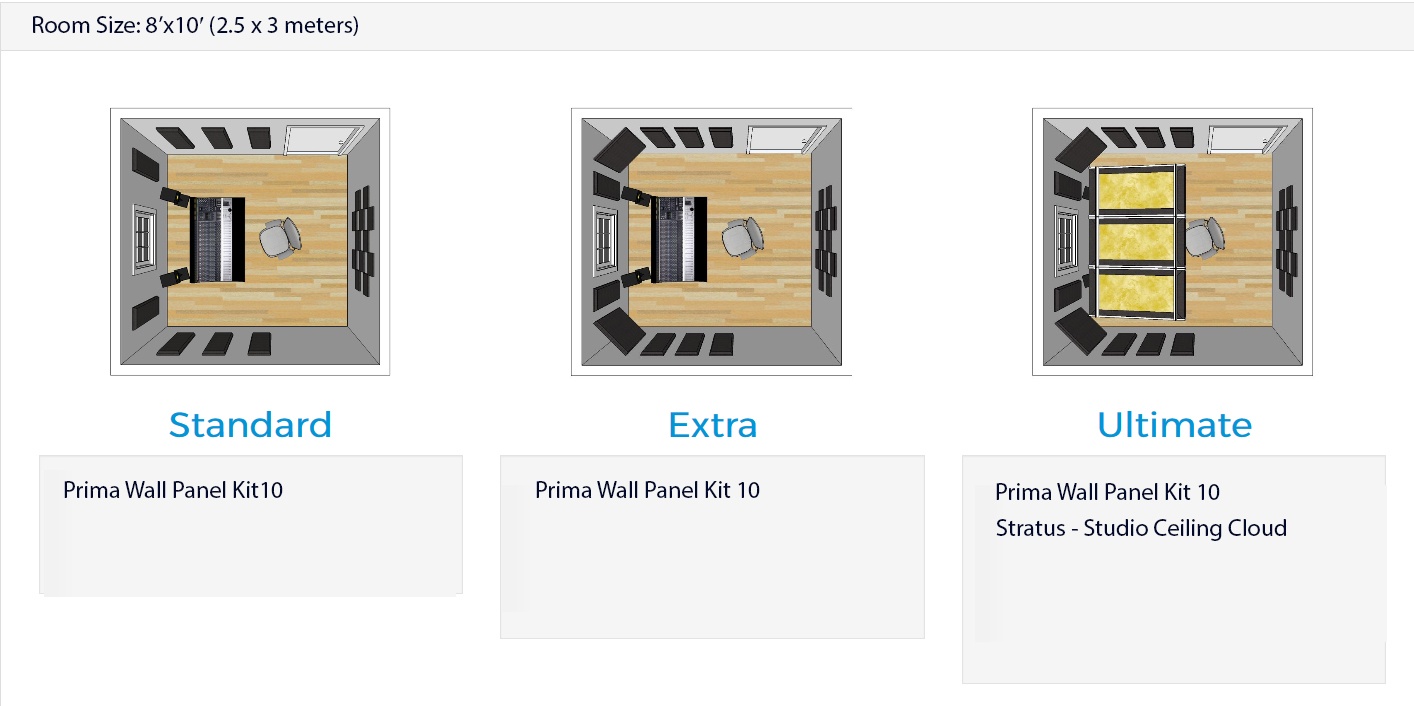
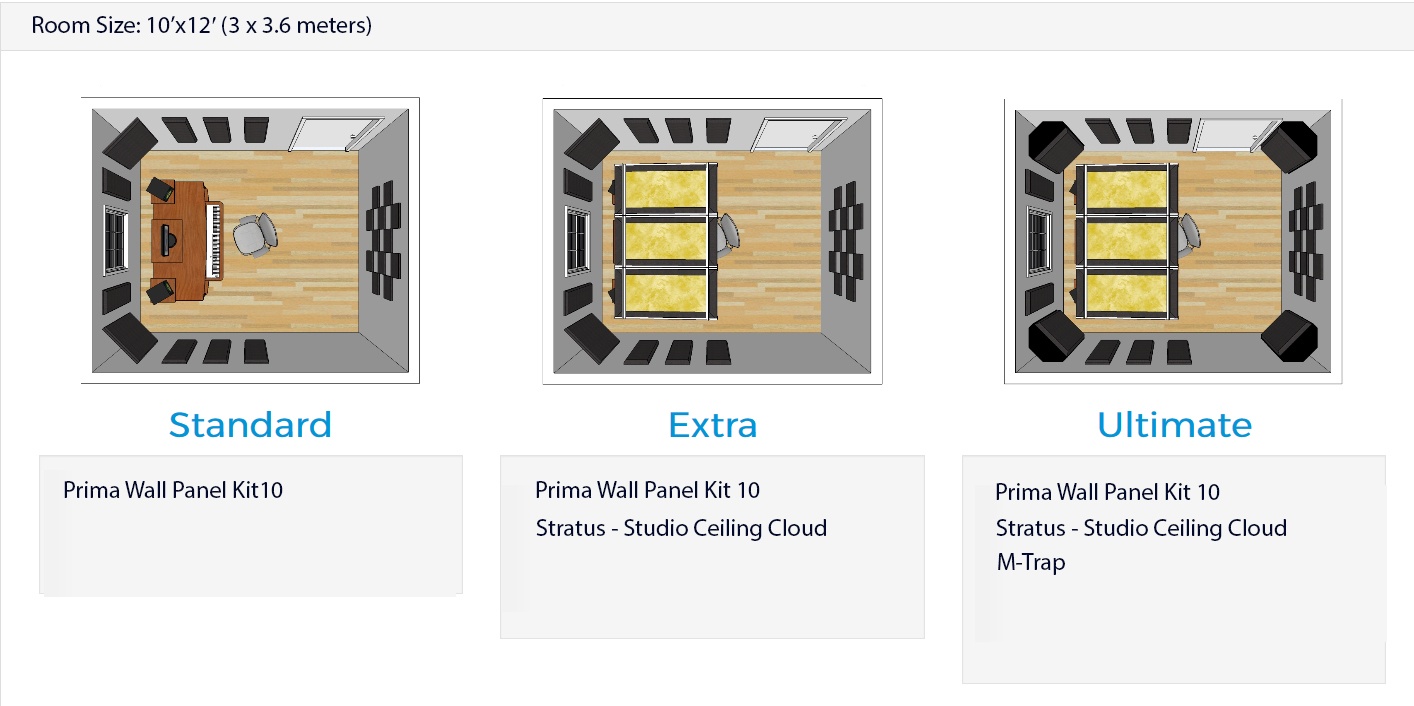
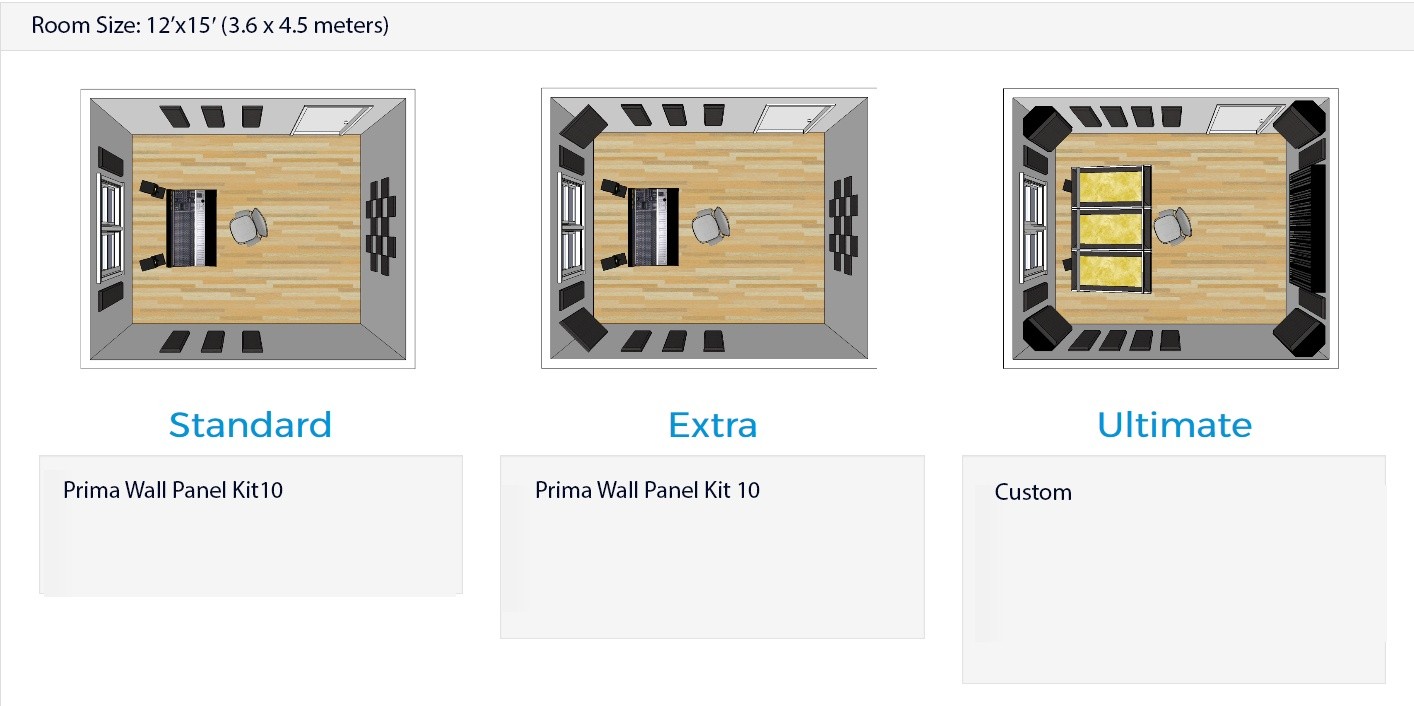
Room Layouts:
Prima Acoustic Solutions
Acoustical Data:
Image Gallery
Prima Acoustic Gallery
Acoustical Room Kit
Acoustical Room Kit 10
Acoustical Room Kit Data
Acoustical Wall Panels
Acoustic Wall Panels Specs
Bass Trap
Bass Trap Data
M-TRAP Specs
F-Trap Data
Full Trap Data
Ceiling Panels
Tiles
S-Tile Data Sheet
T-Tile Data Spec
Clouds
Prima Nimbus Data
Stratus Data
Baffles
Lanterns Data
Saturna Data
Prima Diffusers
R-Diffuser Specs
F-Diffuser Specs
RD Diffuser Specs
Barrel Shaped Diffusers
Pyramid Shaped Diffusers
Barrel Shape Diffusers
Barrell Diffuser Mounting
Case Study:
Home Studios Acoustics
Radio Broadcast Acoustics
Recording Studio Acoustics
Audiophile
Acoustic Applications
- Professional Audio
- Education
- Home Entertainment
- House of Worship
- Food & Beverage
- Large Spaces
- Entertainment Venue
- Large Spaces
- Communication
- Commercial
- Medical
- Sports
- Communications


